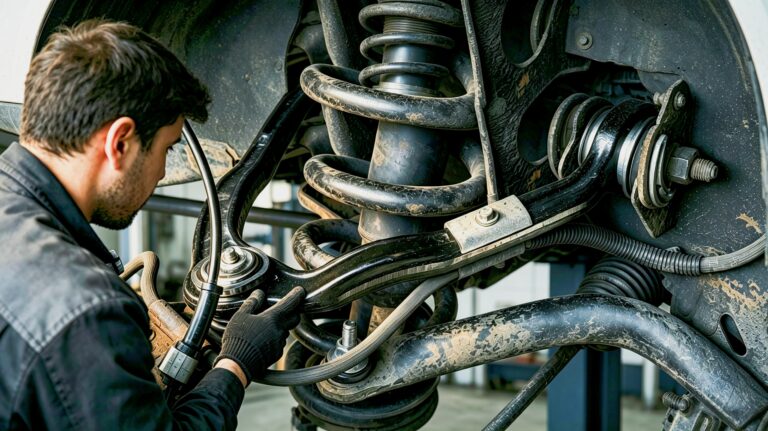
Learn how control arm bushings function, how to diagnose failing joints, and how to replace them yourself using a shop press to eliminate steering vibrations and restore a smooth ride.
What Are the Symptoms of Worn Control Arm Bushings?
Because they absorb thousands of impacts every mile, control arm bushings endure constant stress. It is highly common for the internal elastomer to show significant wear, crack, or completely break after 95,000 miles. When the rubber degrades, it triggers a domino effect that compromises vehicle safety and accelerates tire damage.
Keep an eye and ear out for these classic signs of suspension failure:
-
Clunking or Clattering Noises: A vehicle with worn bushings may experience metallic clattering noises over bumps or a sharp clunking sound when braking. This occurs because the dry, compressed rubber allows the metal arm to slam directly against the subframe brackets.
-
Steering Instability: Worn control arm bushings cause steering instability during highway driving. Because the arm can shift unhindered, your vehicle will uncomfortably wander or drift from side to side, forcing you to make constant micro-corrections.
-
Increasing Vibrations: As the rubber separates from its metal sleeve, excess play is introduced into the front end. This results in noticeable vibrations trembling through the steering wheel, particularly during straight-line acceleration.
-
Uneven Tire Wear: Dynamic misalignment is a direct consequence of failed bushings. As the lower control arm shifts back and forth, your camber and toe settings fluctuate constantly while driving. This leads to rapid, uneven tire wear, typically scouring away the inside edge of your tread.
Can You Just Replace the Bushing Instead of the Whole Control Arm?
Yes, replacing only the new bushings is an acceptable and cost-effective route if the stamped steel or aluminum body of the actual control arm is completely straight, rust-free, and undamaged.
Additionally, you must inspect the condition of the integrated ball joint. If the ball joint is still tight, its rubber boot perfectly sealed, and shows no physical play, saving money by swapping just the bushings is a smart way to go. However, on many modern vehicle applications, the ball joint is permanently pressed or cast into the arm assembly. If both the ball joint and the bushings are showing signs of age, it is far more efficient to replace the entire control arm assembly as a single pre-assembled unit.
How to Replace Control Arm Bushings Step-by-Step
Replacing lower control arm bushings is a labor-intensive job, but with patience and the right tools in your shop, a determined DIYer can successfully complete the project.
Tools and Preparation
-
Floor jack and heavy-duty jack stands
-
Basic socket set, breaker bar, and torque wrench
-
A hydraulic shop press or a heavy-duty C-clamp bushing press kit
-
A bench vice to hold parts securely
-
Penetrating oil (WD-40 or Liquid Wrench)
-
Soap and water (used as a assembly lubricant)
Step 1: Vehicle Lift and Safety
Park the vehicle on a flat concrete surface. Block the rear tires, loosen the front lug nuts, and jack up the front end. Securely lower the vehicle onto your jack stands. Never work under a vehicle supported solely by a hydraulic jack. Remove the front wheels to get a clear, unobstructed view of the suspension geometry. If you’ll be working near the engine-side front subframe area, make sure you have clear access and the vehicle is safely supported before proceeding.
Step 4: Disconnect the Suspension Links
Spray all mounting hardware liberally with penetrating oil. Locate where the lower control arm meets the steering knuckle. Remove the cotter pin and castle nut from the ball joint. Use a ball joint separator tool to loosen the taper. Pro-Tip: To make the removal process easier on many vehicle setups, you can remove the ball joint with the control arm attached by unbolting its retaining hardware directly from the knuckle. Disconnect the sway bar end links from the arm as well.
Step 3: Unbolt and Remove the Control Arm
Locate the inner pivot bolts that secure the control arm to the subframe. Use a breaker bar to break the high-torque fasteners loose. Remove the inner bolts entirely, slide the lower control arm out from its subframe pockets, and lay the component on your workbench.
Step 4: Extract the Worn Bushing
You cannot simply pull a factory bushing out; it is press-fitted with thousands of pounds of pressure.
-
The Manual Press Method: Secure the control arm into a bench vice. Using a dedicated C-clamp bushing press kit, select a receiving cup that is slightly larger than the bushing’s outer metal shell and a driving adapter that matches the inner sleeve. Crank down on the forcing screw to drive the old bushing out of the arm’s bore.
-
The Shop Press Advantage: Using a mechanical hydraulic shop press makes control arm bushing replacement infinitely simpler, saving you muscle fatigue and time. Align the arm perfectly flat on the press plates, place an appropriately sized mandrel on the inner sleeve, and smoothly press the old unit downward out of the eyelet.
Step 5: Install the New Bushing
Before installing your new bushings, use a piece of emery cloth or steel wool to thoroughly clean any dirt, rust, or old rubber fragments out of the control arm’s mounting bore.
-
The Freeze Trick: Place your new metal-sleeved bushings inside your home freezer overnight. The extreme cold slightly shrinks the metal outer shell, making the subsequent press installation remarkably easier.
-
Lubrication: Lubricate rubber or polyurethane bushings with simple soap and water for easier installation. Avoid using heavy, petroleum-based chassis grease on standard rubber bushings, as oil-based lubricants will chemically break down and rot raw rubber compounds over time.
-
Pressing it In: Line up the new bushing perfectly straight with the arm’s eyelet. Using your shop press or mechanical C-clamp kit, apply smooth, continuous pressure to seat the new bushing until its outer metal lip rests completely flush against the face of the arm.
Step 6: Reinstallation and Final Torque
Slide the refreshed control arm back into the subframe brackets. Reinstall the inner subframe pivot bolts, but do not torque them down tight yet. Reconnect the ball joint and sway bar links. Mount the wheels, lower the vehicle to the ground, and bounce the suspension a few times so the full weight of the vehicle settles at its natural ride height.
Once the vehicle is sitting flat on its tires, climb underneath with a torque wrench to execute the final torque settings. For standard vehicle applications like a honda civic or accord, common torque settings for LCA bolts are 52 ft-lb plus an additional 90-degree turn. Torqueing the inner pivot bolts while the suspension is hanging in the air is a critical mistake; it locks the rubber in a pre-twisted position at ride height, which will cause the new rubber to quickly crack, squeak, and tear apart under normal driving conditions.